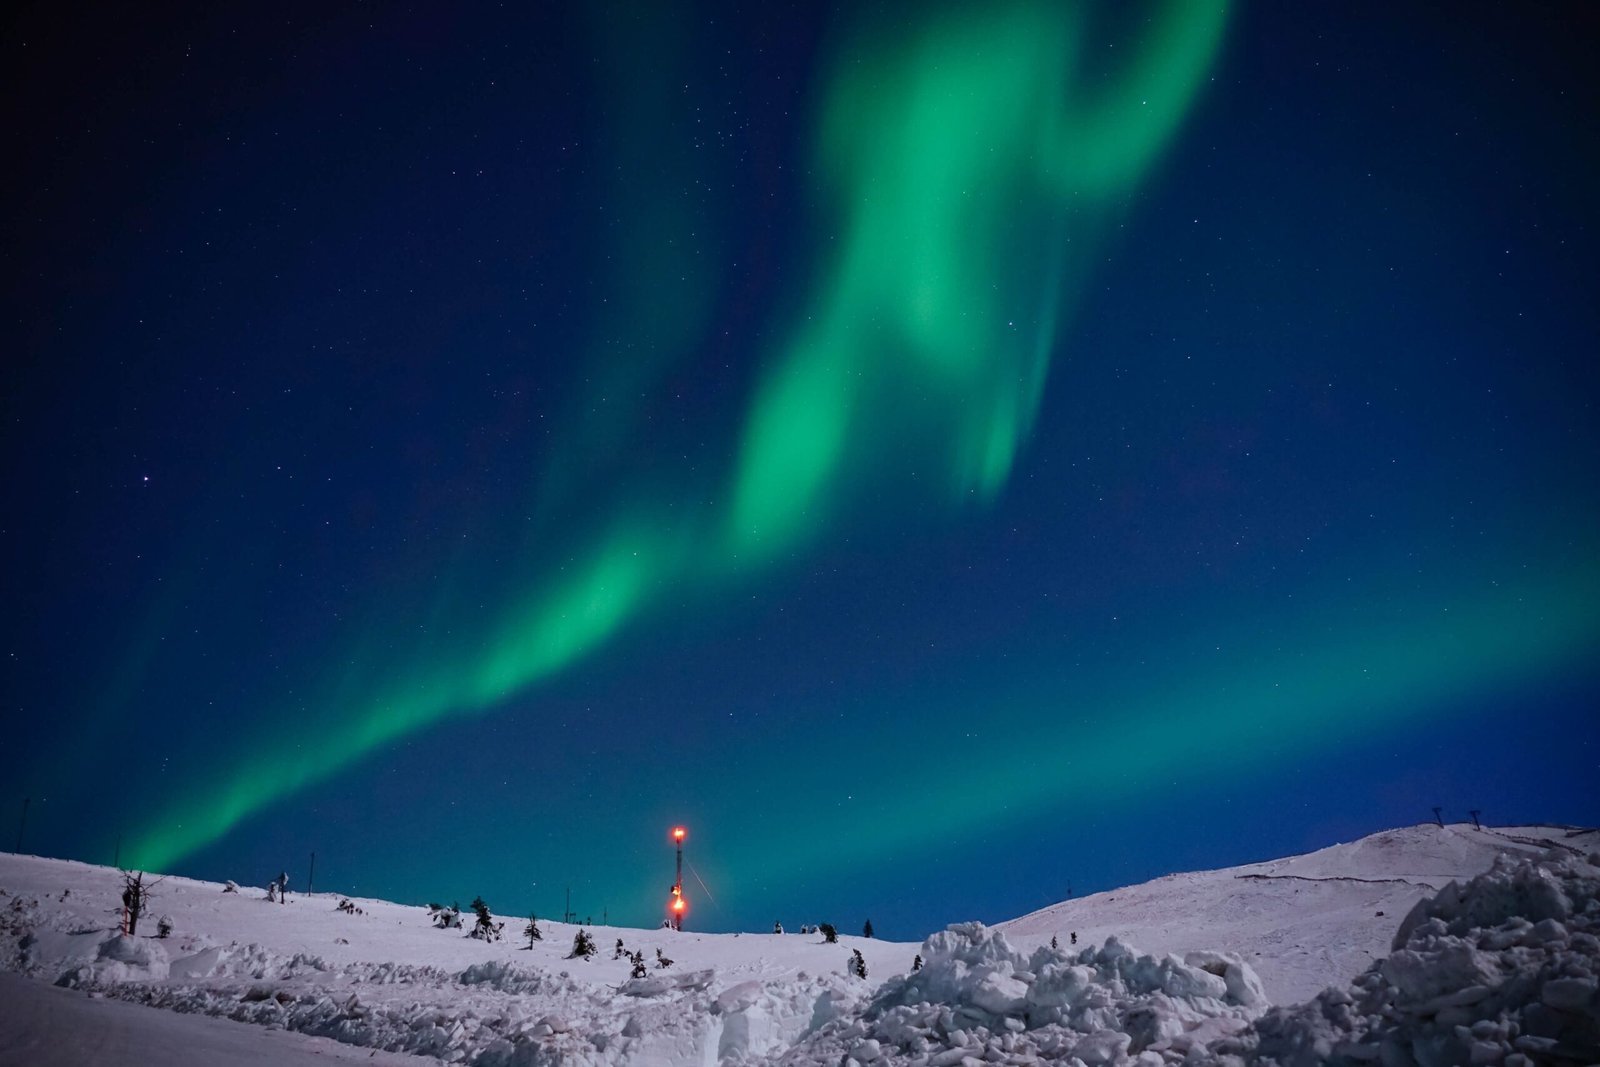
Aurora borealis is a phenomenon that we have been seeing regularly on social media in the winter months for the past few years, and it has to be said that it is a truly beautiful natural phenomenon. Especially in photographs, because it’s the photos from your phone or camera that make the Northern Lights really stand out. That’s not to say that you’ll have trouble seeing it with the naked eye – it’s just not as vibrantly distinctive as it is in photographs.
TIP: What are the best destinations to see the Northern lights?
General tips
There are several general tips for viewing the aurora, and in this article we will look at the most important ones.
- Location – The aurora is visible in only a few places on Earth. These are places that are located around and above the Arctic Circle. Namely, Lapland in Finland and Sweden, Norway, Iceland, Alaska and Russia. In recent years, the glow has also reached closer to more distant destinations, even appearing to a lesser extent in the Czech Republic.
- Season – Generally, total darkness is needed to view the aurora. This is mostly seen in the winter months in the locations mentioned above, but the season is a bit longer – from early September to early April you have a good chance of seeing this show in the sky.
- Clear skies – to have any chance of seeing the aurora borealis at all, clear or at least partly clear skies are the main prerequisite. You won’t be able to see anything through the clouds, especially the lower ones.
- Patience – the aurora borealis is a rare phenomenon that is hard to predict. There are various predictions, but even so, nothing is guaranteed and patience is needed. So be prepared to wait several hours – often in the dead of winter. And be prepared for possible breakages.
- KP Index – One of the forecasts to watch is the KP Index, an indicator of solar activity that has a direct effect on the intensity of the aurora. The higher the number, the stronger the aurora. At least a little bit is visible at around an index of 3, if you see a forecast of 5 or more you will be very lucky.
- Keep an eye on the horizon and the sky above you – the Aurora Borealis is often visible either directly on the horizon or directly overhead. So keep an eye on both, each view is breathtaking.
- Expectations vs. reality – as is generally the case with social media, not everything you see in a pretty picture matches reality. The same goes for the Northern Lights. Medium aurora may not be as visible to the naked eye, certainly not as bright green or pink.


How to take a picture of the Northern Lights with your phone?
Nowadays everyone carries a phone, which is why it is suggested to take pictures of the aurora with this device. As a result, this is the most convenient way to take pictures, and you don’t need anything special. In the case of taking pictures with your phone, you just need an active night mode – the more seconds the better – and at least a steady hand.
Moreover, the phone serves well as a “search engine” for the glow, because the camera amplifies the glow quite significantly, and several times we were able to watch the sky through the phone’s display while hunting for the glow. This is especially true at lower KP Index, when the glow may not be as “bright”.
How to take pictures of the aurora borealis with a camera?
Compared to taking pictures with your phone, shooting the glow with a camera requires manual settings and basic accessories.
- Tripod – the most basic accessory is a tripod. Since you’ll have to set a longer time (exposure) on your camera, trust me, you won’t be able to hold the camera in your hand. A smaller tripod will do, it doesn’t necessarily have to be a giant tripod costing several thousand crowns. You can use it even if you are shooting with your phone.
- Remote shutter release or self-timer – since even the slightest movement of the camera can spoil the resulting photo when shooting the aurora borealis, any movement should be avoided. This can include pressing the shutter button, so we recommend either controlling the camera remotely (e.g. via a mobile app) or at least setting the self-timer to 2 seconds.
- Focal point – usually when shooting aurora you want to be able to see not only the entire glow in the sky, but also for example a mountain, lake or person in the foreground or background. To be able to achieve this, you need a shorter focal length, such as 16 or 24mm. Related to this is the aperture setting, which we discuss below.
- Exposure – as already mentioned, to capture the aurora you need to have a longer exposure time set on your camera. Generally something between 3 and 6 seconds is recommended (3″, 6″ in the camera settings) depending on the other values.
- Aperture – if for exposure you need to have a higher time, for aperture it is exactly the opposite. The lower the “efko” you set, the better the resulting photo will be. Therefore, it is recommended to shoot either on fixed glass, where it is possible to get up to, for example, f1.4, or simply glass with the lowest possible aperture. We personally have experience with the Sigma 18-50mm lens for Sony E-mount (APS-C), where the lowest aperture is f2.8.
- ISO – yes, you can increase the ISO for shooting at night. But the question is to what extent and at what cost of noise. That’s why we recommend setting the ISO between 800 and 1250. The sensitivity will be higher, but the noise will still not appear. “It is also important to adjust the ISO to the size of your sensor. The bigger it is, the higher you can afford the sensitivity”, says Jakub Gulec, expert editor of photomobile comparison.
- Sharpening – finally, it is necessary to mention the sharpness of the photo. The last thing you want to find out after all that effort, a giant “burst” of glow in the sky, is that your photos are blurry. That’s why we recommend going into manual focus mode and always focusing on the brightest star in the sky.


As you can see from the list above, it’s not easy to take a picture and actually see the Northern Lights at all. We dare say you won’t have any problem taking photos on your phone, and if you share your creation “only” on Instagram, the quality will be fine. In the case of shooting on a camera, with a tripod and the various settings mentioned above, it is already more prone to errors – but the result is worth it.
Photo editing
Keep in mind also that most of the photos you see on social media, and indeed in this article, have undergone some editing. The original photos of the aurora aren’t as striking and have had their exposure, contrast and other settings increased. In our case, through Adobe Lightroom.

Do you want to go to Finland or Iceland and experience the Northern Lights for yourself? Check out our tailor-made itinerary and let us create a detailed plan to suit your requirements.